35+ Mesmerizing Styles? Cat eye nail varnish
Ready to discover a manicure that genuinely transforms your look? Let’s chat about cat eye nail varnish, because it’s absolutely captivating. This isn’t just another polish; it’s a dynamic, shimmering effect that brings a luxurious, almost magical depth to your fingertips. Since its explosion onto the beauty scene, the allure of cat eye nail varnish has only intensified, especially with innovative designs like aurora shifts and intricate double stripes trending heavily in 2026. If you haven’t tried this magnetic marvel, prepare for your at-home nail routine to get a serious upgrade.
cat eye nail varnish: 35 Mesmerizing Styles?
Ever wondered how those hypnotic, glowing stripes appear on nails, shifting with every movement? That’s the magic of cat eye nail varnish. This specialized polish, most commonly gel-based, contains microscopic, iron-rich metallic particles suspended within its formula. The secret truly unfolds when a magnet is held over the wet, uncured polish. The magnetic field pulls these particles into a concentrated line or curve, creating a striking, three-dimensional light band across the nail surface. The result is a truly spellbinding, reflective appearance that mimics the sharp, focused slit of a feline’s eye as it catches the light.
This distinct shimmer band isn’t static; it moves and dances as you tilt your hand, offering a truly unique visual experience. According to recent nail artistry trend reports, this dynamic effect is one of the most sought-after cat eye nail designs of 2026, making a bold statement across fashion editorials and social media feeds alike. It’s a sophisticated choice that offers both glamour and a touch of playful mystique.
The Science Behind Cat Eye Nail Varnish
The captivating effect of magnetic nail polish is surprisingly straightforward in its scientific principle. Within each bottle, finely milled iron-oxide or comparable metallic particles float suspended in either a gel or traditional lacquer medium. The key to activating the cat eye nail varnish effect happens while the polish remains in its liquid, uncured state. By positioning a specialized magnet typically 2 to 5 millimeters above the nail’s surface and holding it steady for approximately 5 to 10 seconds, the magnetic force draws these tiny particles into a precise alignment, forming that iconic radiant stripe.
A critical step, often overlooked by newcomers, is the immediate curing of the gel after magnetization. Without any hand movement, your finger must transition directly under a UV/LED lamp. This rapid curing process locks the magnetically arranged particles firmly into position. Any premature movement, or a delay in curing, can cause the particles to disperse, resulting in a blurred or absent stripe. Precision and timing are everything for a crisp, defined finish.
The positioning and angle of your magnet wield considerable power over the final aesthetic. Holding the magnet directly above the nail will produce a classic, centered cat eye line. Tilting it towards a side creates a dramatic diagonal sweep. Utilizing a specialized double-bar magnet can generate two perfectly parallel lines, opening a world of creative cat eye nail art possibilities. Experimentation with magnet placement is where true artistry begins.
My Take
When I first tried this, I was convinced it was going to be super difficult, but honestly, the magnet technique clicks after just a few practice nails. My best advice? Hold your hand as still as humanly possible and get that magnet really close, but not touching. Give it the full 10 seconds. My third nail was always the charm, and now I can whip out a perfect cat eye manicure in no time. It’s so satisfying!
The Best Nail Shapes for Cat Eye Nail Varnish in 2026
While the captivating shimmer of cat eye magnetic gel enhances any nail shape, certain silhouettes truly maximize its visual impact, allowing the shifting light band to shine brightest. Recent fashion trend tracking charts indicate these shapes are particularly popular for showcasing the dynamic effect:
- Almond: This elegant, tapered shape perfectly complements the natural curve of the cat eye effect, mirroring the feline eye itself. It’s an impeccable choice for the classic single-line design, offering a sophisticated and elongated aesthetic.
- Coffin/Ballerina: The broad, flat surface of coffin nails provides an expansive canvas for the magnetic stripe, allowing it to appear exceptionally dramatic and well-defined. For more inspiration on this shape, explore our guide to short coffin nail designs for 2026.
- Stiletto: For a bold and theatrical statement, stiletto nails are unparalleled. Their long, sharply pointed tips make the magnetic stripe appear like a focused beam of light, adding an edgy, futuristic touch to your cat eye nail varnish.
- Oval: Soft, classic, and incredibly versatile, the oval shape provides a natural and harmonious base for the cat eye stripe. It delivers a polished, effortlessly wearable result suitable for various occasions.
- Square/Squoval: These shapes also work beautifully, especially when paired with modern double-stripe designs. The clean, flat edge of square or squoval nails provides an ideal architectural foundation for parallel magnetic lines.
If you’re still undecided about which nail shape best suits your hands, our comprehensive nail shape guide offers detailed insights, breaking down recommendations based on finger length and hand width to help you discover your perfect match.
30+ Creative Cat Eye Nail Varnish Ideas for 2026
The timeless single stripe is merely the starting point for exploring the expansive world of cat eye nail varnish. The year 2026 is seeing an explosion of innovative and dazzling cat eye nail trend looks, pushing the boundaries of magnetic artistry. Here’s an exhaustive compilation of designs to inspire your next captivating manicure:
1. Classic Single Stripe
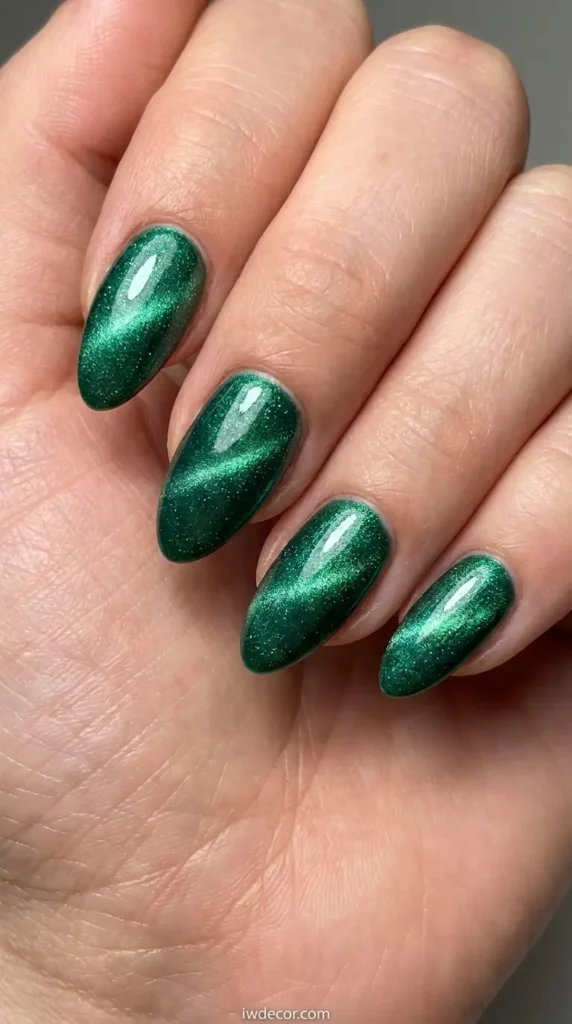
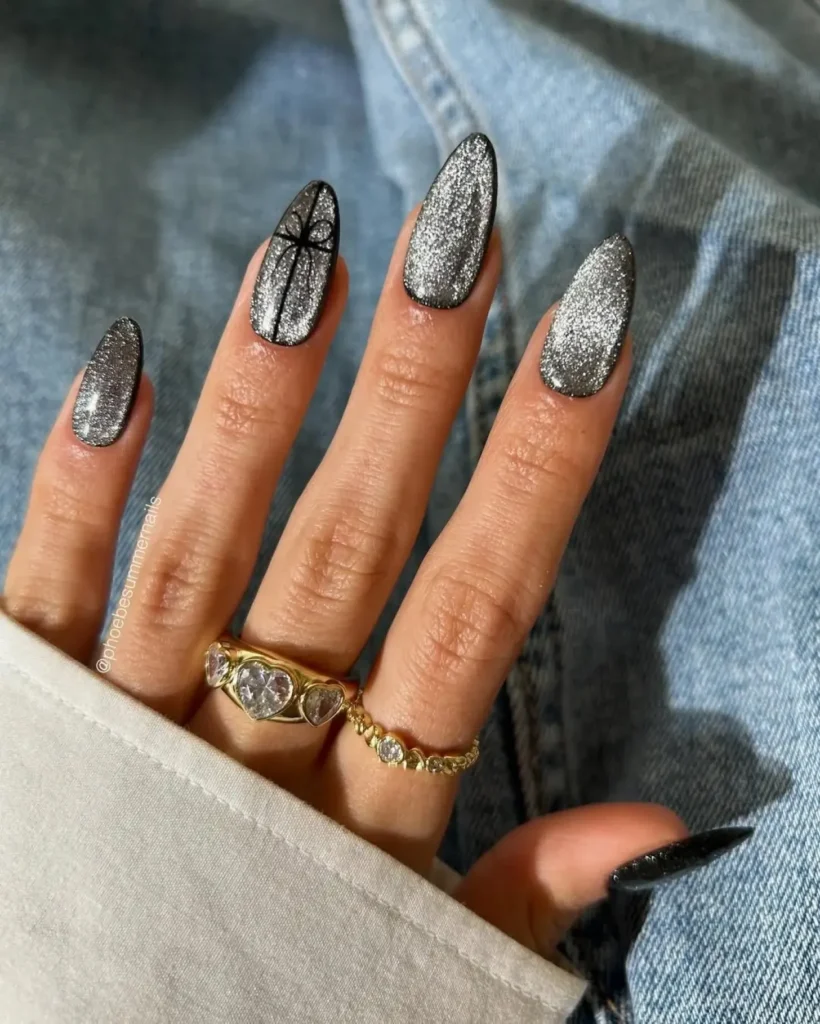
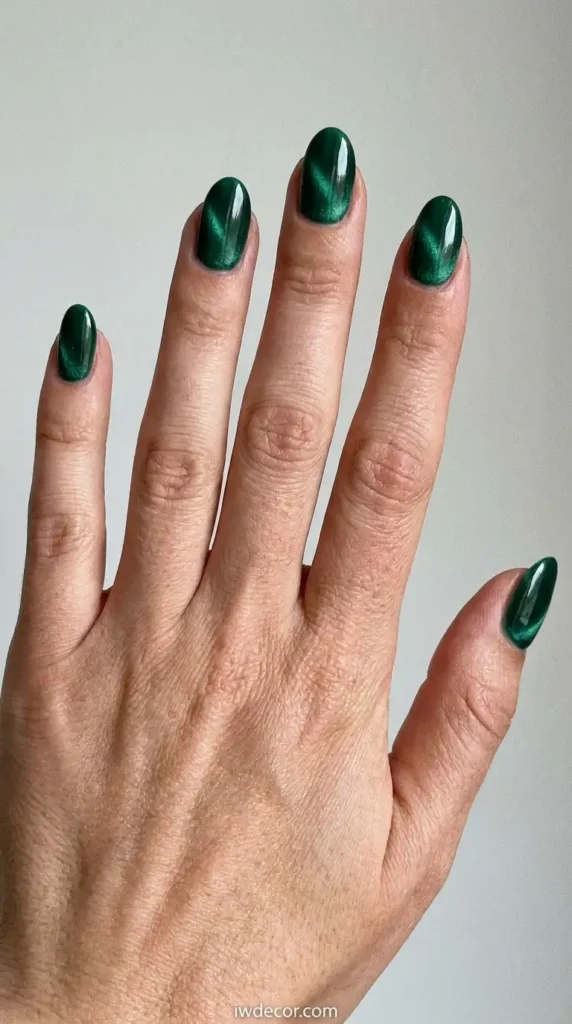
This iconic design features a singular, luminous stripe running down the center of each nail, creating a deep, reflective effect. It’s perfect for those new to cat eye nail varnish, offering a sophisticated shimmer that’s universally flattering. Ideal on an almond or oval base, often in a rich emerald green or deep sapphire blue.
2. Double-Stripe Cat Eye
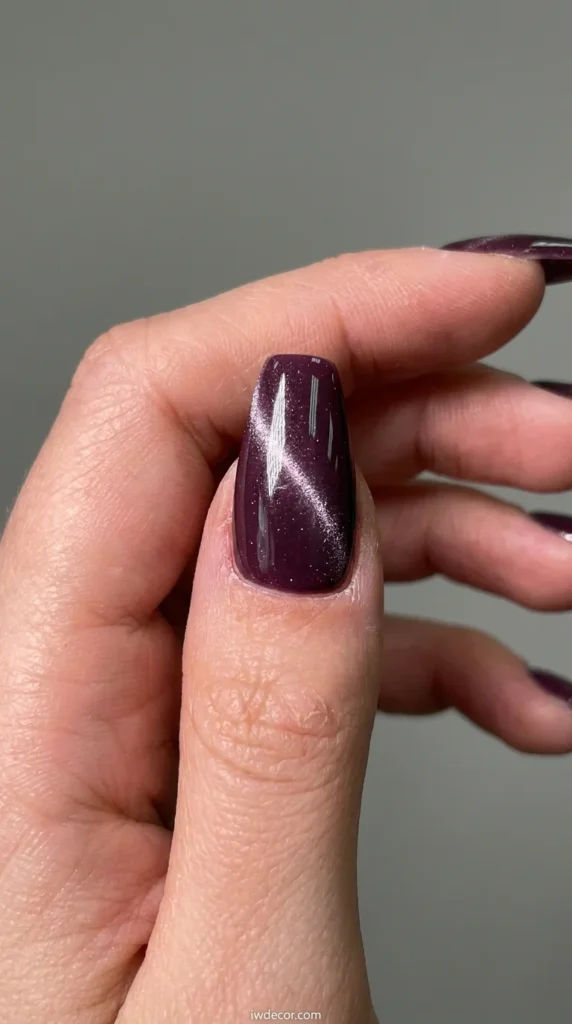
Utilizing a specialized dual-bar magnet, this design creates two parallel, defined magnetic lines on each nail. It offers an architectural and intentional aesthetic, particularly striking on longer coffin or square shapes. Try it with a deep plum base and silver magnetic lines for a sophisticated vibe.
3. Aurora Cat Eye

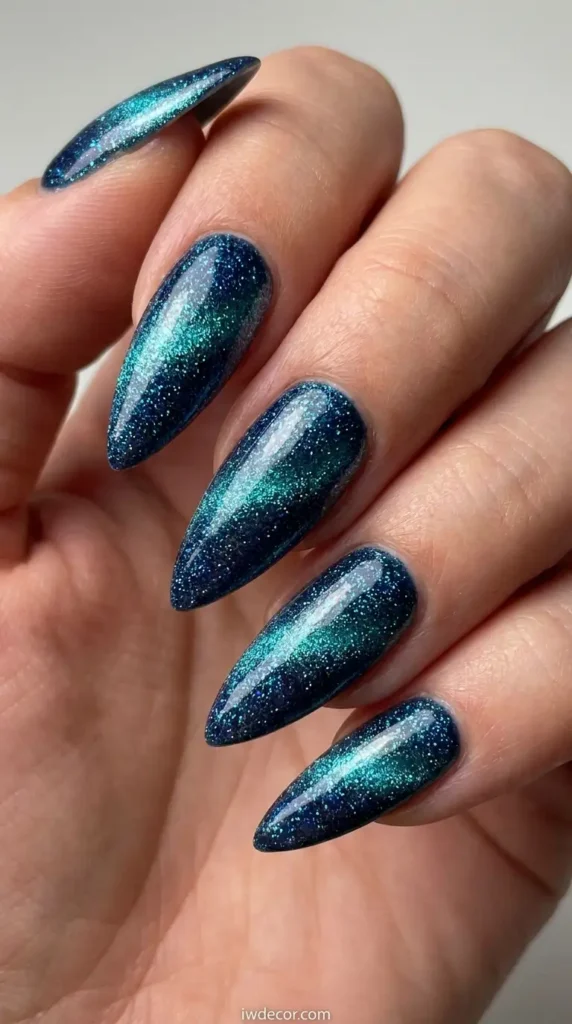
Achieve an ethereal, multi-chrome effect that shifts between vibrant pink, mystical green, and serene blue. This design is truly captivating, mimicking the natural phenomenon of the aurora borealis. It works beautifully on a clear or very light base to maximize its translucent glow.
4. Cat Eye Ombré
Layer two complementary cat eye colors, applying one over the other before magnetizing. The magnetic stripe will beautifully pick up both shades, creating a seamless, multi-dimensional ombré effect. A popular combination is a dark blue base with a teal cat eye overlay.
5. Cat Eye with Chrome Powder
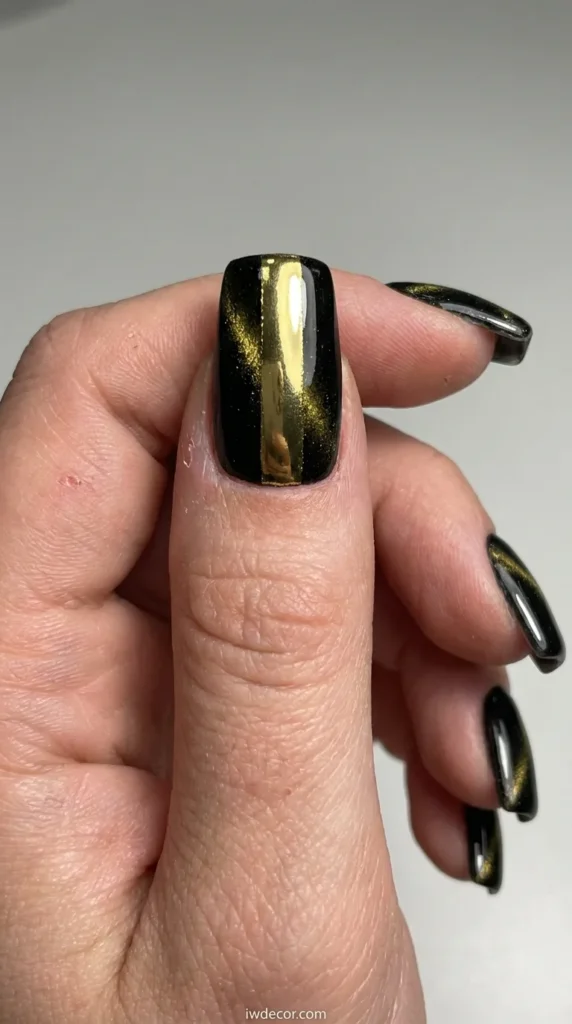
For an elevated, mirror-like finish, apply a fine chrome powder over your cured cat eye design. This adds an extra layer of metallic sheen, making the magnetic stripe appear almost liquid. Gold or silver chrome over a black cat eye is incredibly dramatic.
6. Cat Eye with Nail Decals
Incorporate delicate foil or intricate floral decals around the magnetic stripe for a maximalist, bejeweled effect. This adds texture and visual interest, turning your nails into miniature works of art. Consider subtle gold foil accents around a deep red cat eye.
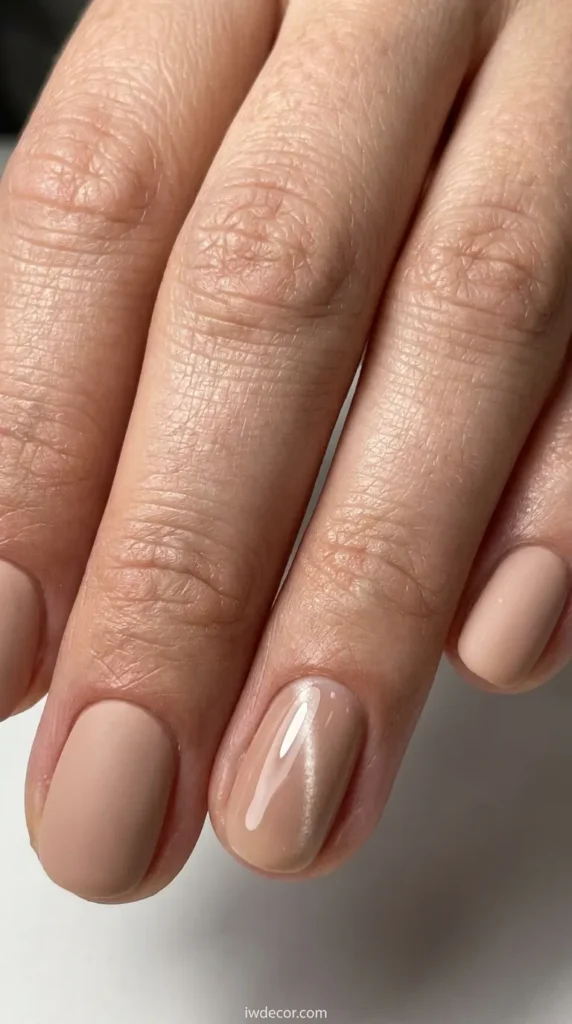
7. Subtle Everyday Cat Eye
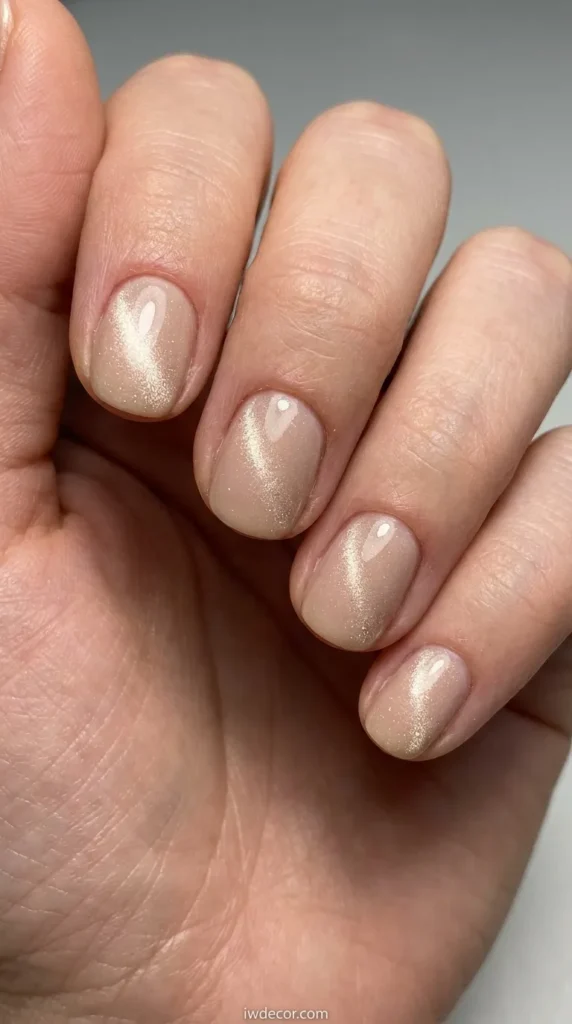
For a sophisticated, office-friendly look, choose a nude or muted base color paired with a champagne or soft gold cat eye stripe. This creates an understated yet genuinely beautiful shimmer that catches the light subtly, perfect for professional wear.
8. Diagonal Cat Eye

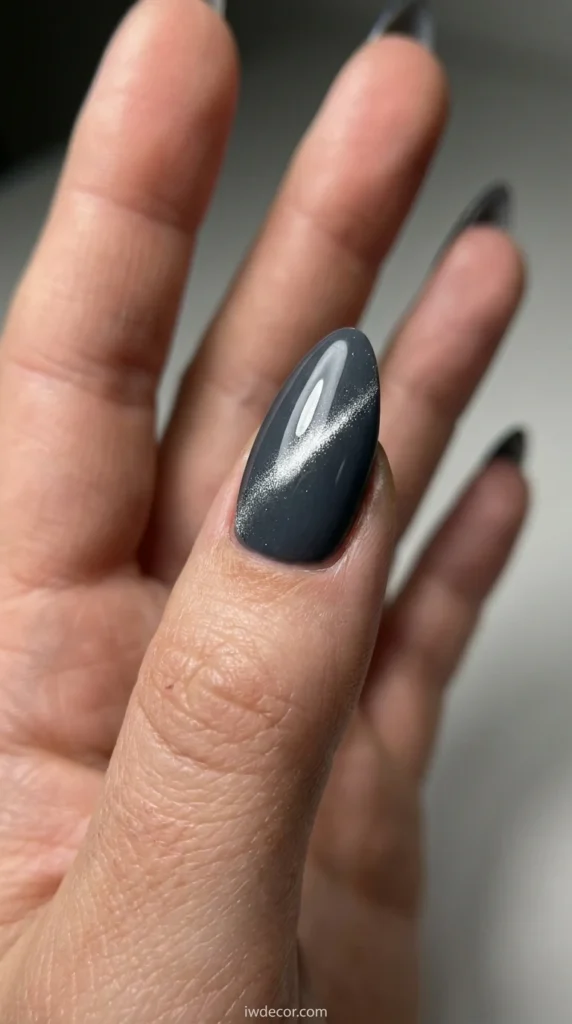
Instead of a vertical stripe, angle your magnet to create a dynamic diagonal line across the nail. This technique can make shorter nails appear longer and adds a modern, edgy twist to the classic cat eye. Try a silver stripe on a charcoal gray base.
9. Vertical Cat Eye
A straightforward, elegant stripe running perfectly straight from cuticle to tip. This classic alignment enhances the natural length of the nail and offers a clean, sophisticated look. A deep ruby red cat eye varnish on a black base is always stunning.
10. Horizontal Cat Eye
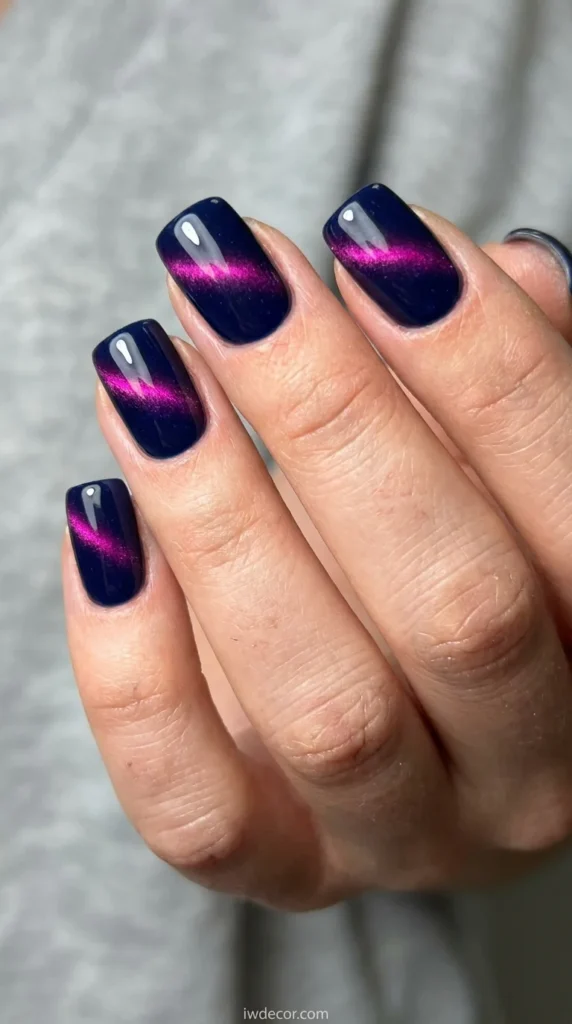
Create a bold, distinctive horizontal stripe across the nail, often near the tip or center. This unconventional placement offers a modern, art-forward look. A vibrant fuchsia cat eye on a deep navy base makes a striking contrast.
11. Cat Eye French Tip
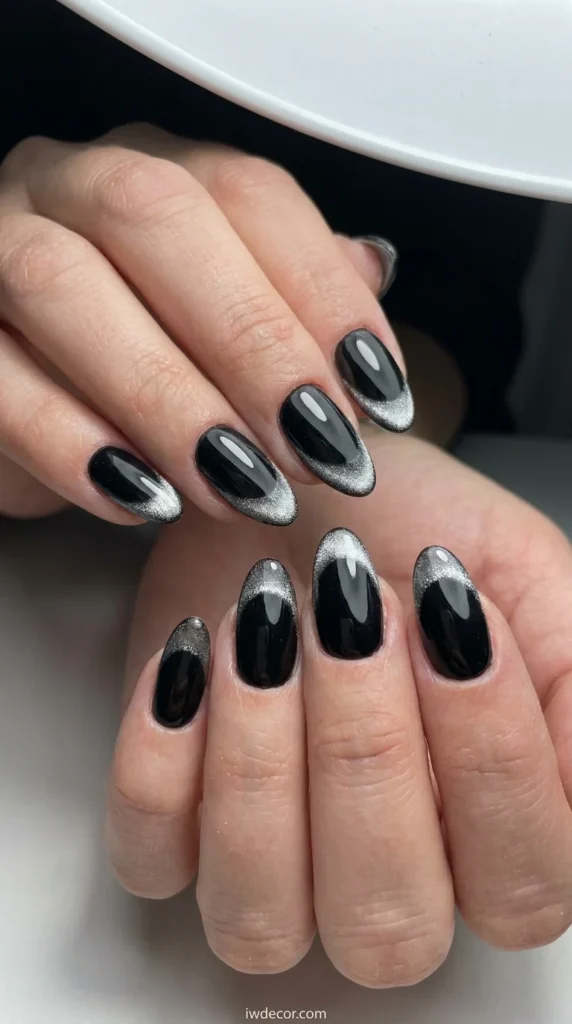
Reinvent the classic French manicure by using cat eye nail varnish for the tip. This adds a subtle yet mesmerizing shimmer to the traditional white or colored tip. A black base with a silver cat eye tip is incredibly chic.
12. Half Moon Cat Eye
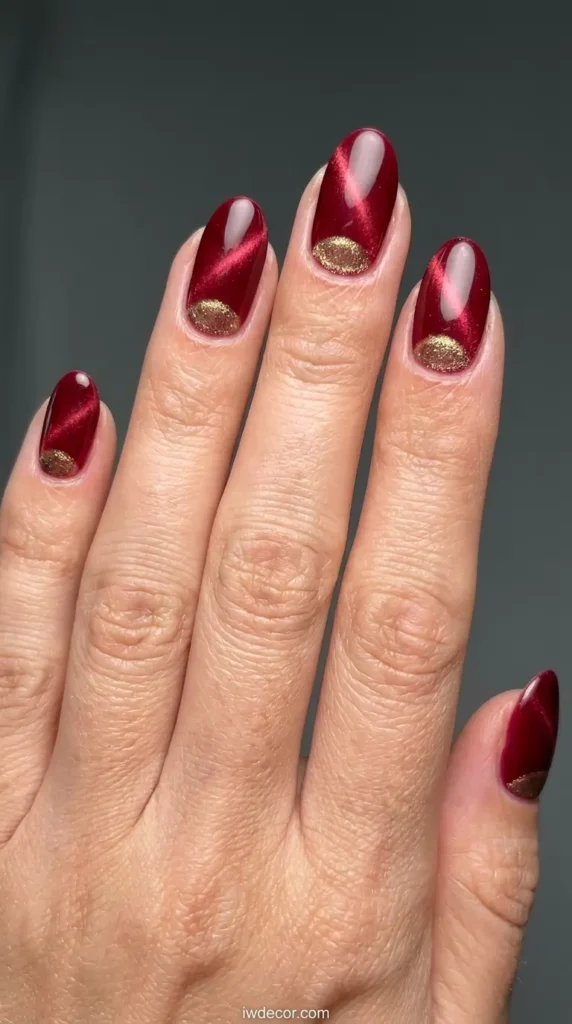
Create a shimmering, crescent-shaped cat eye effect at the base of the nail, mimicking a reverse French manicure. This elegant design adds a touch of vintage glamour. A deep red base with a gold magnetic half-moon looks incredibly luxurious.
13. Negative Space Cat Eye
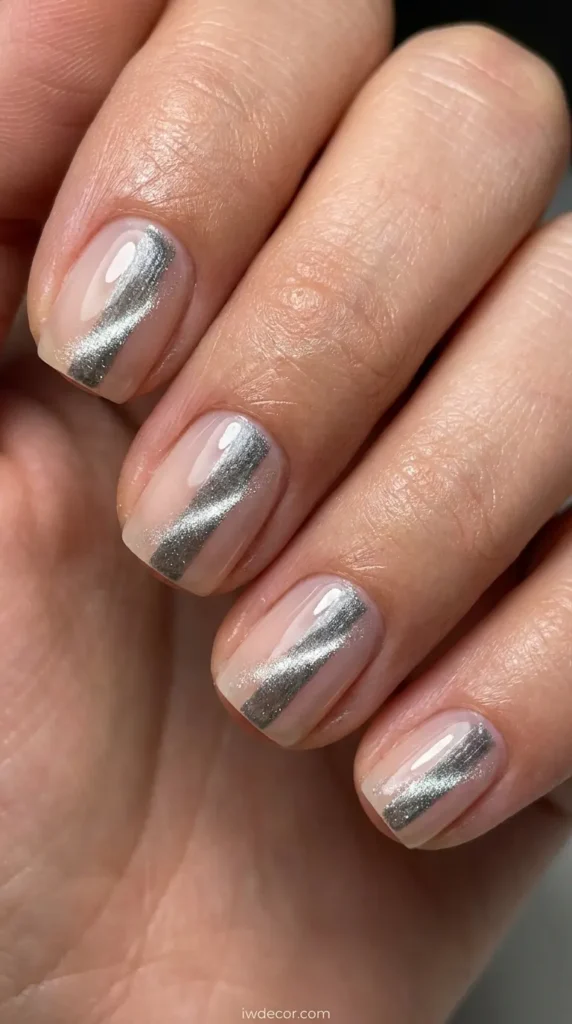
Incorporate sections of clear nail or a nude base to create intriguing negative space designs, with the cat eye effect strategically placed to highlight these areas. This modern approach is chic and minimalist. Think a diagonal cat eye stripe leaving a clear triangular section.
14. Glitter Cat Eye
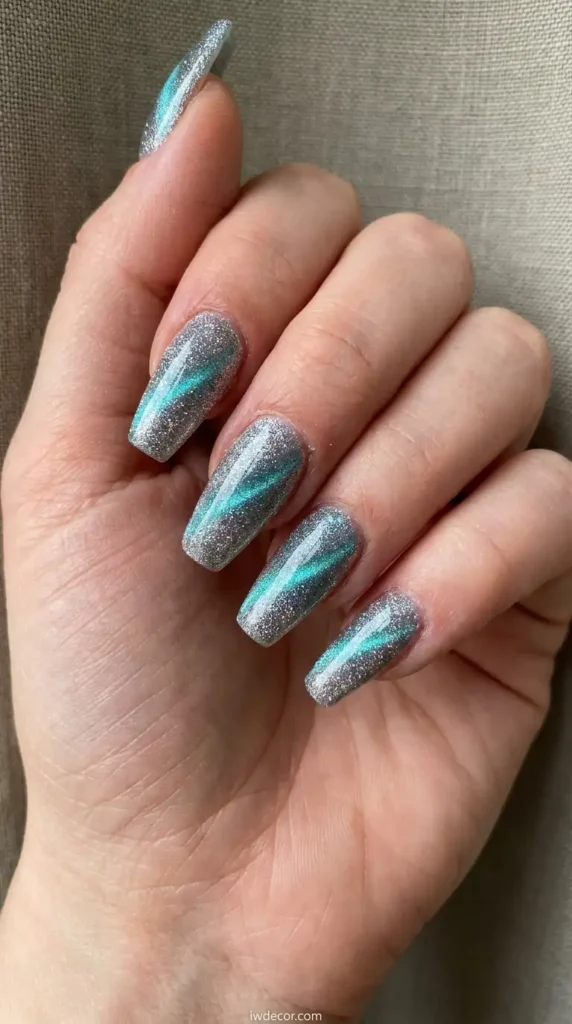
Layer a cat eye polish over a glitter base coat or add fine glitter dust to the uncured cat eye layer before magnetizing. This combines two dazzling effects for maximum sparkle and depth. A teal cat eye over a chunky silver glitter base is truly festive.
15. Matte Finish Cat Eye
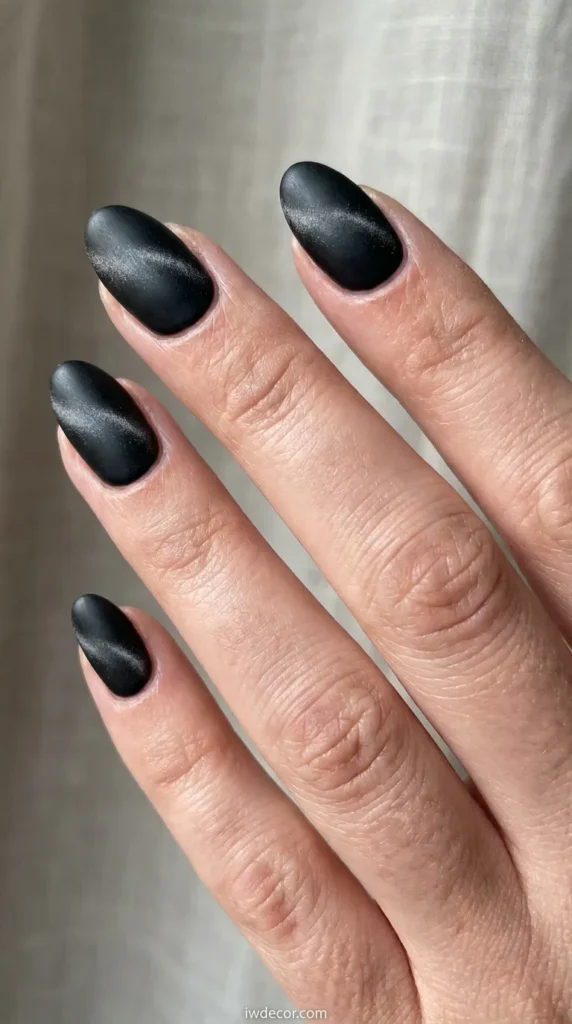
After curing your glossy cat eye design, apply a matte top coat to transform the look. The matte finish provides an unexpected contrast, making the shimmering stripe pop with a unique, velvety depth. A black cat eye with a matte finish is incredibly edgy.
16. Jewel-Toned Cat Eye
Embrace luxurious depth with cat eye nail varnish in rich jewel tones like emerald green, sapphire blue, ruby red, or amethyst purple. These shades naturally enhance the magnetic shimmer, creating a truly opulent effect. Perfect for evening events or adding a touch of glamour to your everyday.
17. Pastel Cat Eye

For a softer, whimsical look, opt for cat eye nail varnish in delicate pastel shades like lavender, mint green, or baby blue. This creates a dreamy, iridescent shimmer that’s perfect for spring or a subtle, playful touch. Pair with a matching pastel base for a monochrome effect.
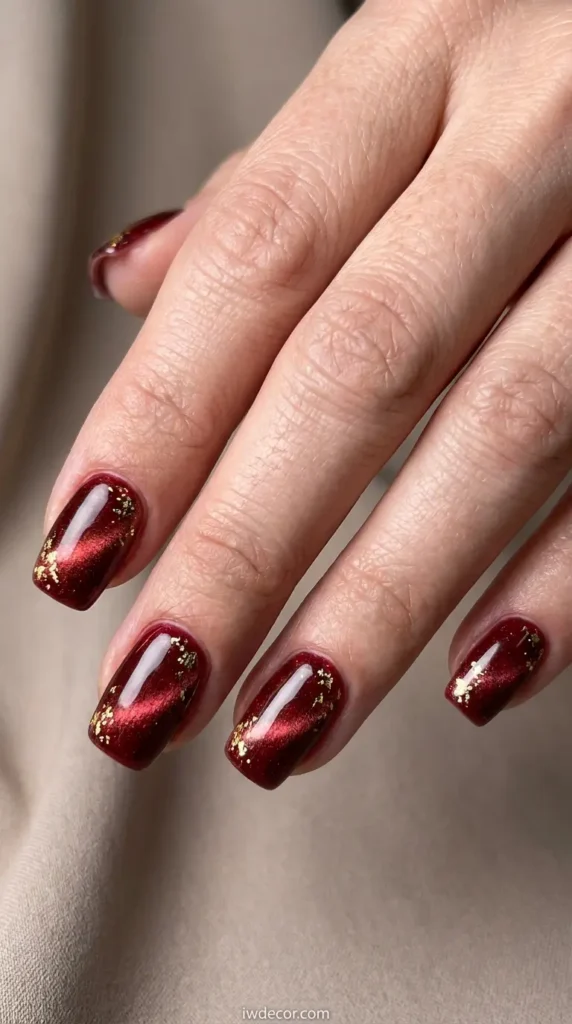
18. Deep Burgundy Cat Eye
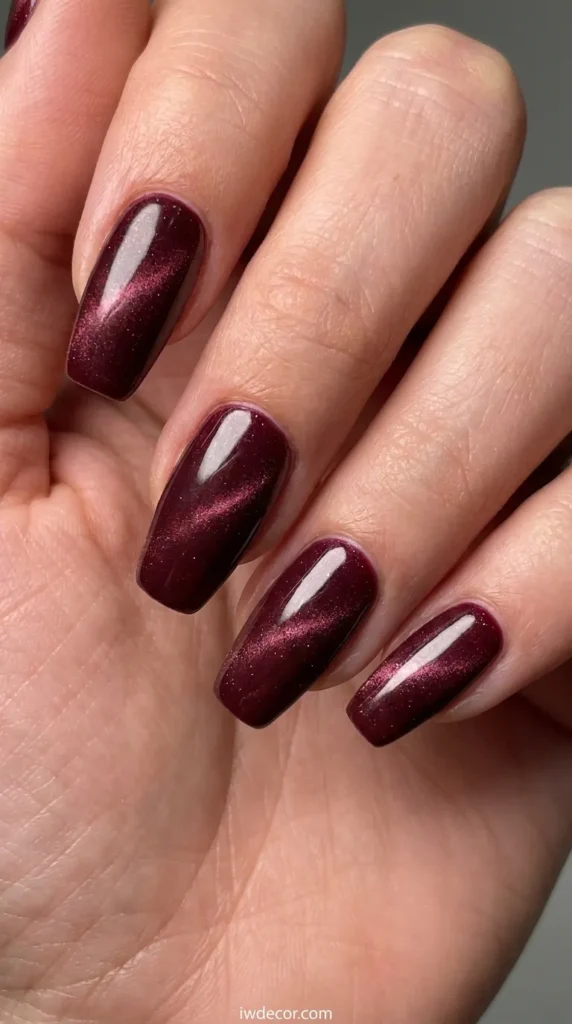
A rich, opulent burgundy base with a matching or slightly lighter magnetic stripe creates a sophisticated and warm look. This shade is particularly stunning for autumn and winter, offering a cozy yet glamorous feel. Ideal for short coffin or squoval shapes.
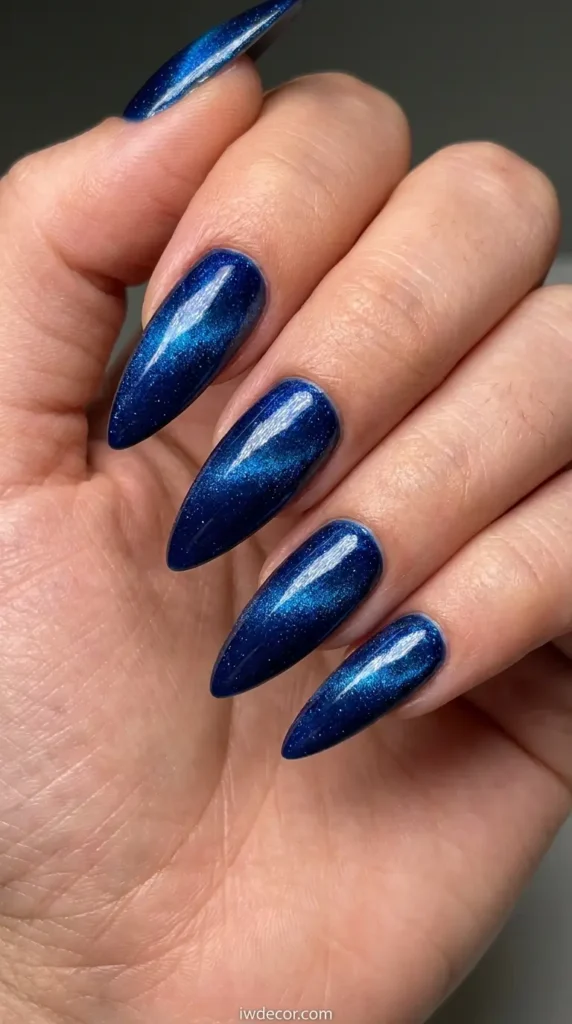
19. Midnight Blue Cat Eye
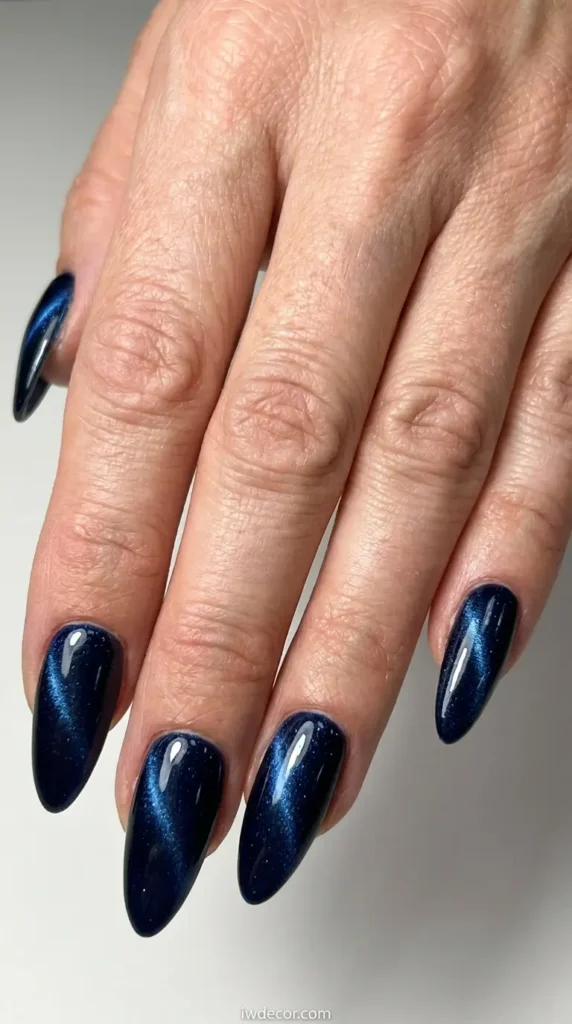
Evoke the depth of a star-filled night sky with a deep midnight blue cat eye nail varnish. The magnetic shimmer appears like distant galaxies, adding a mysterious and glamorous touch. This looks incredible on stiletto or almond nails.
20. Forest Green Cat Eye
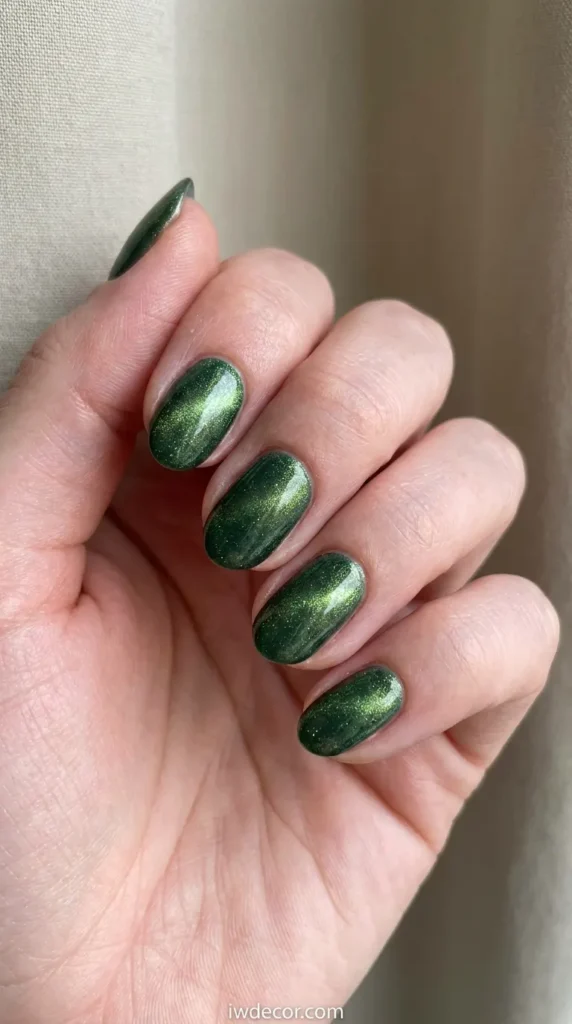
Tap into nature’s elegance with a deep forest green cat eye, reminiscent of lush woodlands. The magnetic effect adds a dynamic, organic shimmer, perfect for those who love earthy yet luxurious tones. This shade is exceptional on short, oval nails.
21. Golden Hour Cat Eye
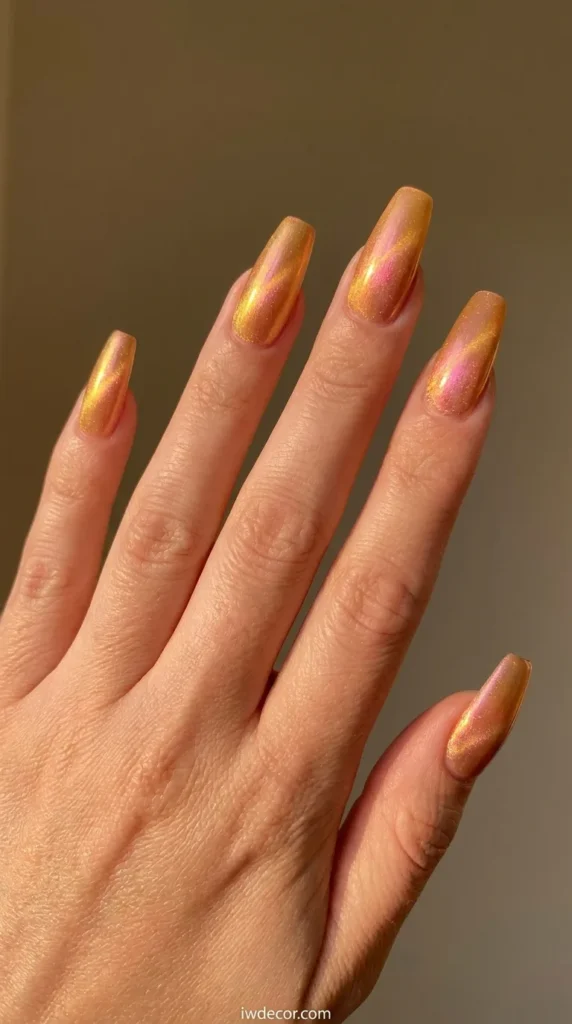
Capture the warm, radiant glow of a sunset with a cat eye varnish that shifts through warm gold, orange, and subtle pink tones. This creates a luminous, inviting look that’s perfect for summer or a cozy autumnal feel. Apply over a peach-toned base for maximum warmth.
22. Silver Streak Cat Eye
A sharp, brilliant silver magnetic stripe over any base color creates a striking, futuristic contrast. This look is bold and modern, perfect for those who prefer cooler metallic tones. A black or deep grey base makes the silver truly pop.
23. Rose Gold Cat Eye

Embrace the warmth and elegance of rose gold with a shimmering cat eye effect. This delicate metallic shade adds a romantic and luxurious touch, beautiful on its own or over a soft pink or nude base. Perfect for a feminine and sophisticated aesthetic.
24. Black Base with Rainbow Cat Eye
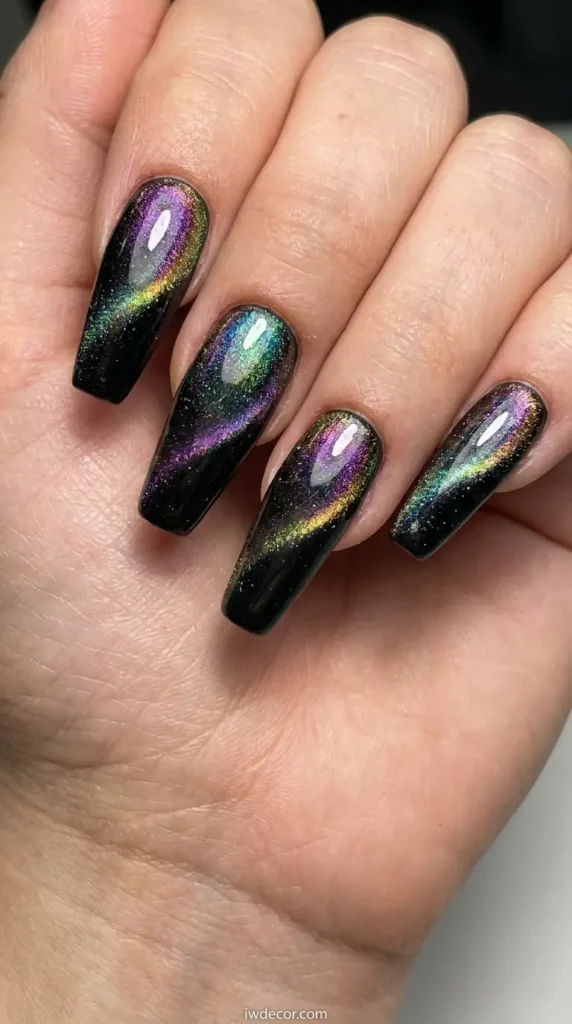
For a truly dramatic and vibrant look, apply a rainbow-shifting cat eye varnish over a stark black base. The dark background makes the full spectrum of colors pop with incredible intensity, creating a mesmerizing, otherworldly effect.
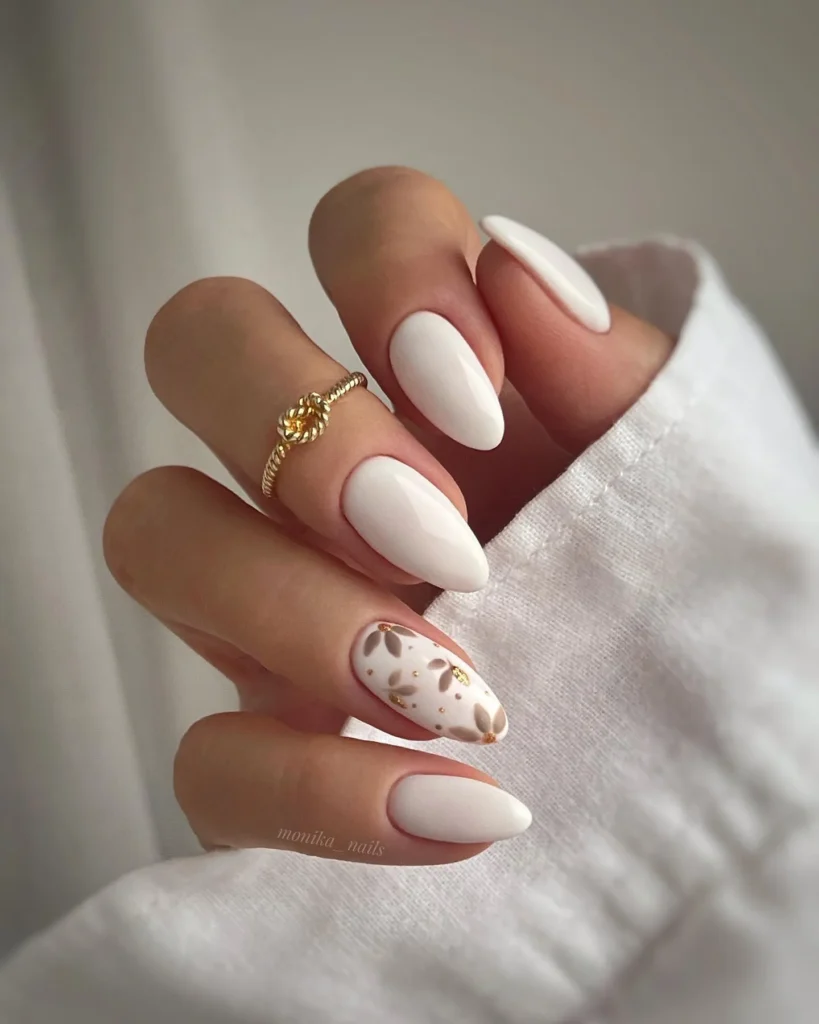
25. White Base with Iridescent Cat Eye
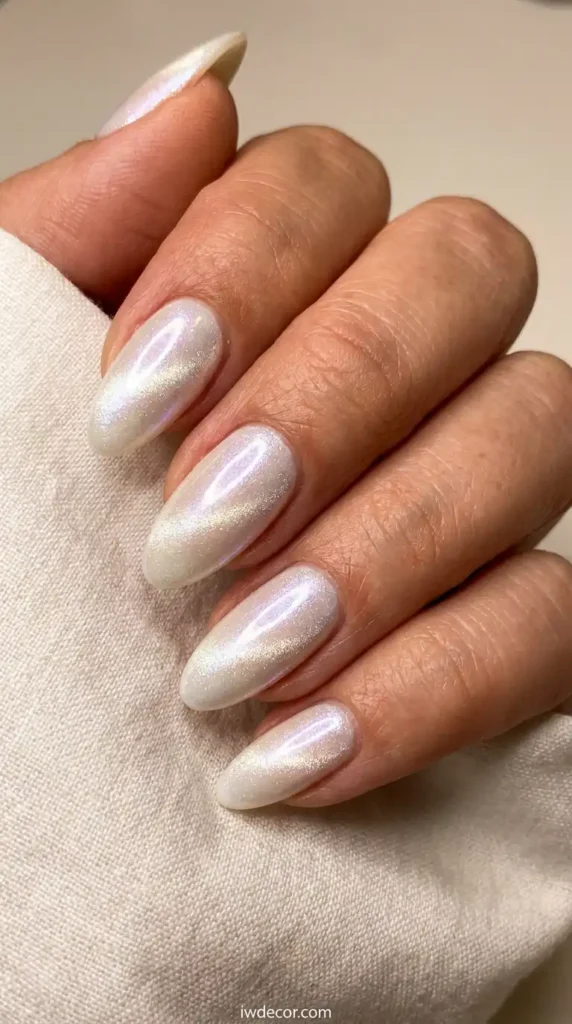
For a soft yet striking look, apply an iridescent or opalescent cat eye varnish over a crisp white base. This combination creates a delicate, pearlescent shimmer that shifts with the light, offering an angelic and sophisticated aesthetic. Perfect for bridal or elegant events.
26. Multi-Directional Stripes
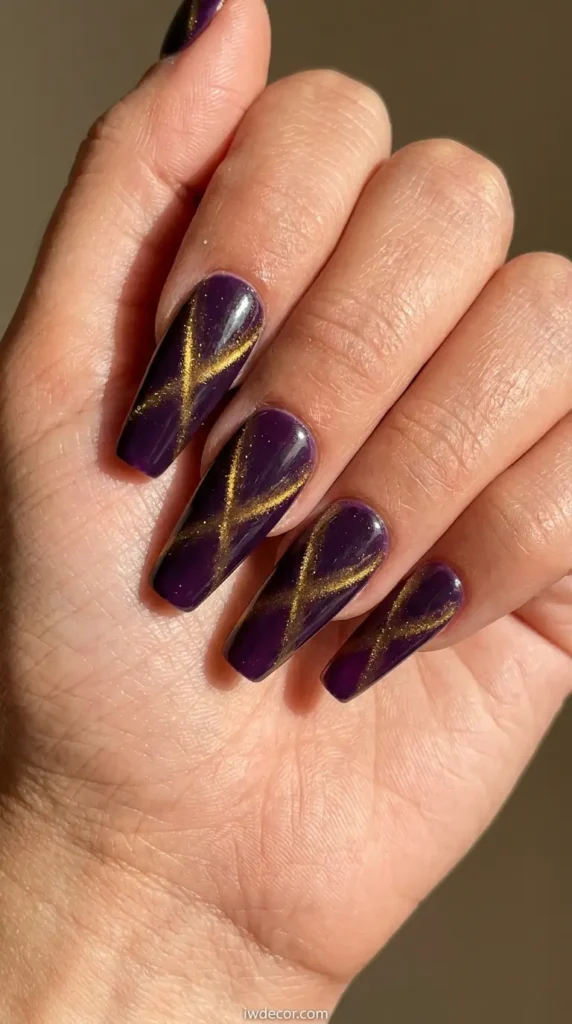
Experiment with creating crossing or intersecting magnetic stripes on a single nail. This advanced technique requires precise magnet control but results in a complex, mesmerizing pattern that truly stands out. A deep purple base with intersecting gold stripes is stunning.
27. Abstract Swirl Cat Eye

Instead of straight lines, use your magnet to create soft, organic swirls and curves with the metallic particles. This artistic approach results in a unique, painterly effect that’s truly one-of-a-kind. Try a forest green cat eye varnish with abstract swirls on an oval nail.
28. Geometric Cat Eye Patterns
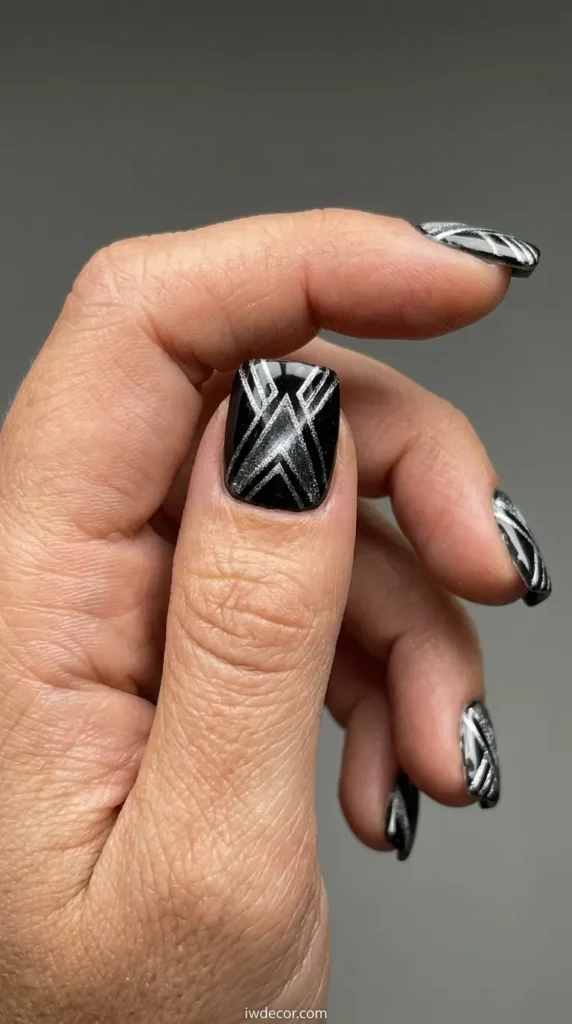
Use various magnet shapes or precise angles to create sharp, geometric designs with your cat eye varnish. Think triangles, squares, or chevrons of shimmering light. This modern, edgy look is perfect for those who love structured nail art. A silver geometric pattern on a black square nail is incredibly striking.
29. Cat Eye Accent Nails
Instead of doing a full cat eye manicure, choose one or two accent nails to feature the magnetic effect. This allows you to incorporate the trend subtly, pairing it with complementary solid colors or minimalist designs on the other nails. A single cat eye nail varnish accent on a nude manicure is chic.
30. Reverse Cat Eye
Instead of the stripe running down the center or tip, position the magnet to create the shimmering effect closer to the cuticle area. This unexpected placement offers a fresh, modern take on the cat eye, drawing attention to the nail bed. A deep emerald green cat eye varnish with a reverse stripe is very chic.
31. Goth Chic Cat Eye
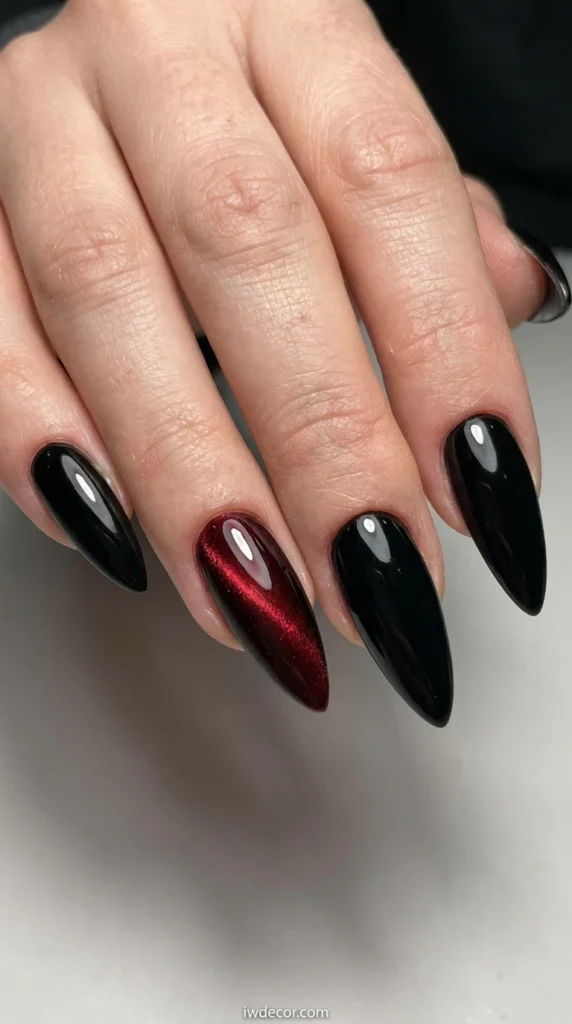
Combine the moody elegance of gothic aesthetics with the magnetic shimmer. A stark black base paired with a deep red, purple, or even a subtle silver cat eye stripe creates a dramatic, edgy, and undeniably chic look. Perfect for stiletto or coffin shapes.
32. Minimalist Thin Line Cat Eye
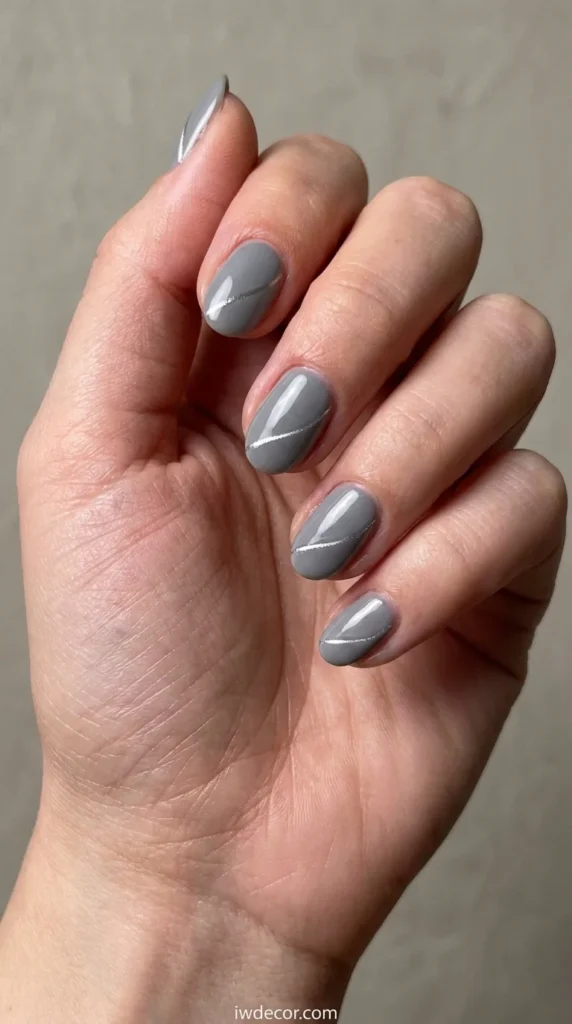
For a subtle, understated approach, create an extremely fine, delicate magnetic line. This minimalist design offers a sophisticated hint of shimmer without overwhelming the nail, perfect for a chic and modern aesthetic. A barely-there silver stripe on a muted grey base is effortlessly elegant.
33. Chunky Bold Stripe Cat Eye
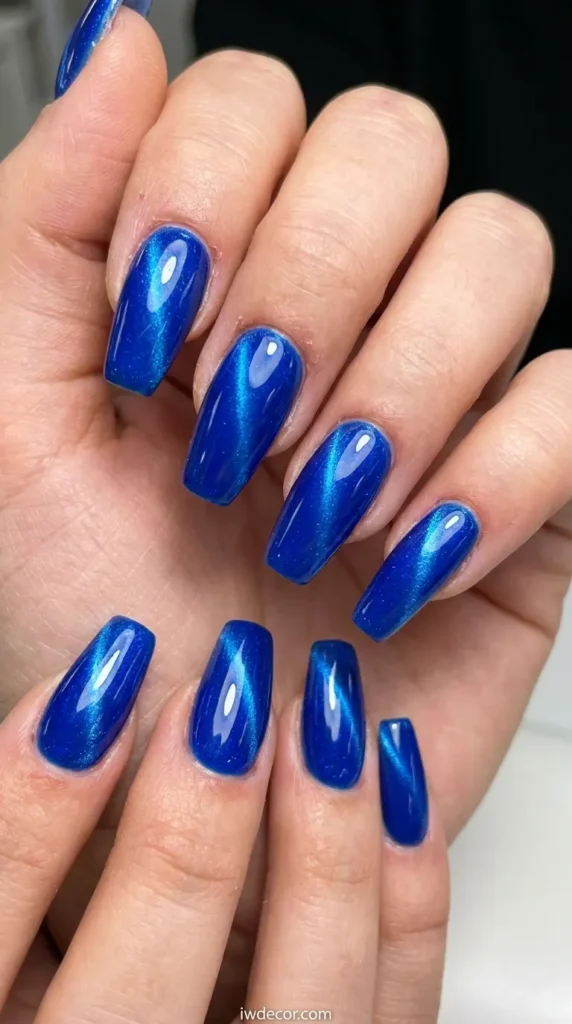
In contrast to the minimalist approach, create a wider, more pronounced magnetic stripe for a statement-making look. This bold design maximizes the shimmering effect, making it impossible to miss. A vibrant electric blue cat eye varnish with a chunky stripe on a coffin nail is eye-catching.
34. Cat Eye with Rhinestones

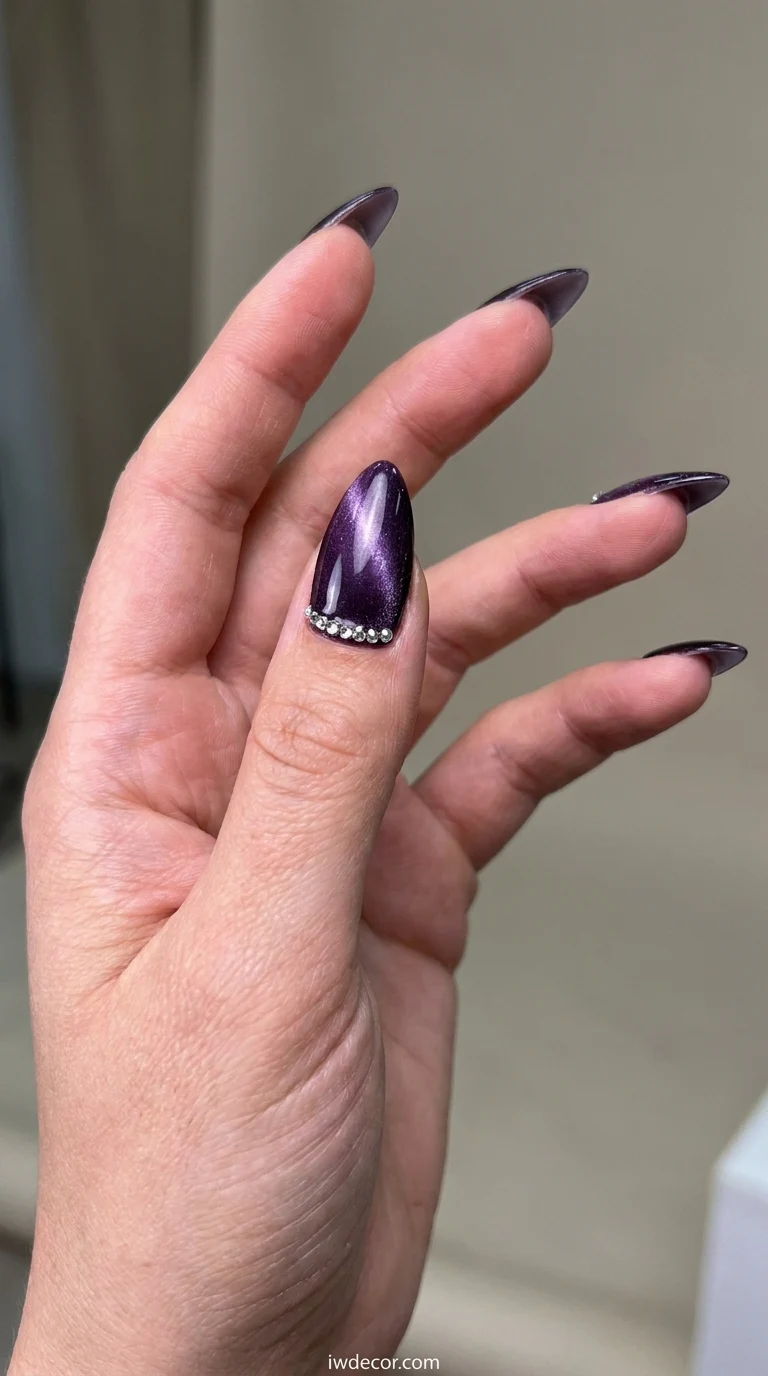
Elevate your cat eye manicure by adding strategically placed rhinestones or crystals. These embellishments catch the light and enhance the shimmer of the magnetic stripe, adding an extra layer of glamour and luxury. Small silver rhinestones along the edge of a purple cat eye stripe are dazzling.
35. Pearl Effect Cat Eye

Achieve a soft, luminous pearl-like glow with your cat eye varnish. This effect is subtle yet incredibly elegant, mimicking the delicate iridescence of a pearl. It’s perfect for a sophisticated, timeless look, especially beautiful on almond or oval shapes. A soft white or ivory base enhances the pearlescent quality.
Cat Eye Nail Varnish vs. Holographic Polish: What’s the Real Difference?
It’s easy to confuse cat eye and holographic nail polishes; both offer stunning, light-catching effects. However, their mechanisms and visual outcomes are quite distinct. While holographic polishes scatter light into a full spectrum rainbow across the entire nail surface, cat eye nail varnish creates a focused, directional stripe or pattern that appears to float and shift in three dimensions. The former is about prismatic sparkle; the latter is about dynamic depth.
Holographic polish achieves its effect through micro-glitters that diffract light, requiring no special tools beyond the polish itself. Cat eye polish, conversely, absolutely requires a magnet to manipulate its metallic particles into the signature design. For optimal results with cat eye gel polish, a dark or jewel-toned base is typically recommended to enhance the contrast of the magnetic stripe, whereas holographic polishes can shine over virtually any color. In terms of current trends for 2026, cat eye designs, particularly the aurora and double-stripe variations, are seeing a massive surge in popularity, offering a fresh take on metallic finishes that holographic polish, while still beloved, can’t quite replicate in terms of moving, directional light.
Can You Achieve Cat Eye Nails Without a Magnet?
To put it plainly: no. The defining characteristic of cat eye nail varnish is its unique magnetic effect. Without the specific application of a magnet, this specialized polish will simply appear as a shimmering, metallic lacquer, devoid of the iconic, light-shifting stripe. The entire product concept hinges on the magnetic manipulation of its metallic particles, a feat that cannot be replicated through any other means. The good news is that most comprehensive cat eye gel kits include a suitable magnet, and standalone nail magnets are readily available and quite affordable.
While some might consider using household magnets, such as those found on refrigerators or phone cases, for an impromptu attempt, their effectiveness is generally limited. The strength and shape of a magnet directly dictate the clarity and precision of the stripe. Standard household magnets often yield uneven or fuzzy results due to their generalized magnetic fields. For consistent, crisp, and beautifully shaped cat eye designs, investing in a proper nail magnet—designed as a flat bar or a dual-stripe tool—is essential. This specialized tool ensures professional-looking finishes every time.
Is Cat Eye Nail Varnish Safe for Natural Nails?
When applied and removed correctly, utilizing cat eye nail polish on natural nails is entirely safe. The formulation itself is comparable to standard gel polishes and poses no inherent additional risks. Potential issues typically arise from improper application techniques or incorrect removal methods, which can compromise nail health.
For instance, over-curing under a UV/LED lamp can lead to dryness of the nail plate and surrounding skin; always adhere strictly to the curing times specified on your product labels. Skipping a crucial base coat can result in nail staining, particularly with intensely pigmented cat eye colors. The most significant cause of nail damage stems from peeling or picking off the gel polish. Proper removal involves a gentle soak-off method using acetone and foil wraps, or professional assistance from a qualified nail technician. Additionally, continuous back-to-back gel applications without intermittent breaks can thin the nail over time; industry styling guides recommend allowing your nails a “breather week” every few months. For comprehensive instructions on safe gel removal, consult our detailed guide on how to remove gel nail polish, which outlines every step to preserve nail integrity.
How Long Can You Expect Cat Eye Nail Varnish to Last?
A meticulously applied cat eye manicure, complete with a professional base coat, the magnetic gel layer, and a durable top coat, can reliably last anywhere from 10 to 14 days on natural nails. When applied over acrylics or other nail extensions, this longevity can extend even further. Several factors significantly influence the wear time of your cat eye nail varnish:
- Nail Preparation Quality: Inadequate cleaning and dehydration of the nail bed are primary culprits for premature gel lifting. Ensure your nails are perfectly prepped.
- Top Coat Application: “Capping” the free edge of the nail (applying a thin line of top coat along the very tip) is essential. This seals the color and creates a protective barrier against chipping and wear.
- Daily Lifestyle: Frequent immersion in water, such as extensive hand washing or swimming, and exposure to harsh chemicals can accelerate wear.
- Lamp Performance: An underpowered or aging UV/LED lamp may not fully cure the gel, leading to compromised durability and early lifting. Always ensure your lamp is functioning optimally and provides sufficient wattage for your gel products.
Cat Eye Nail Varnish for Short Nails
Absolutely, short nails can flawlessly carry off cat eye nail polish; don’t let any misconceptions suggest otherwise! The secret lies in selecting designs that are focused and choosing rich, deep base colors. A dark foundation ensures the magnetic stripe truly pops, even on a smaller nail surface. For those with shorter nails, consider these chic options:
- A single, centered stripe on a dramatic black or deep navy base maximizes impact and creates an illusion of depth.
- A diagonal stripe, spanning from one corner to the opposite, can visually elongate the nail, adding an elegant sweep.
- A nude cat eye offers a barely-there, sophisticated elongating effect, making it an excellent choice for a professional yet stylish look.
Cat Eye Manicure for Special Occasions
For a truly elegant cat eye nail varnish for wedding manicure, consider delicate champagne, soft rose gold, or ethereal ice-white bases paired with a gentle gold or pearlescent cat eye stripe. This combination photographs exquisitely, providing a subtle dimensional shimmer that traditional nude nails simply cannot replicate. It adds a touch of bespoke luxury without being overpowering.
When preparing for parties and vibrant events, dare to go bold! Opt for deep violet or mysterious midnight black bases, enhanced with a dual-stripe magnet effect and a dazzling chrome top coat. This combination ensures your nails will attract compliments all night, all while keeping your product investment remarkably minimal, typically under £15 for the essential items.
How to Apply Cat Eye Nail Varnish at Home: A Step-by-Step Tutorial ?
Ready to master your very own cat eye manicure? Follow these precise steps for a flawless, salon-worthy finish right from your kitchen table.
Step 1: Meticulous Nail Preparation
Begin by gently pushing back your cuticles, lightly buffing the nail surface to create a receptive texture, and thoroughly cleansing away any natural oils or residues using a dehydrator or alcohol wipe. This foundational step is absolutely non-negotiable for achieving optimal adhesion and extended wear of your cat eye nail varnish.
Step 2: Apply a Quality Base Coat
Next, apply a thin, even layer of a high-quality gel base coat. This protective layer shields your natural nails from staining and provides an ideal surface for the subsequent gel layers to bond. Cure this base coat under your UV/LED lamp for the duration specified by the product manufacturer, typically 30-60 seconds.
Step 3: Lay Down a Dark Foundation
To truly make the magnetic effect of your cat eye nail varnish pop, apply a thin coat of a dark, rich gel polish. Deep shades like classic black, sophisticated navy, luxurious burgundy, or an earthy forest green will provide the most dramatic contrast. Cure this dark base layer completely under your lamp.
Step 4: The Cat Eye Gel Application
Now, apply a smooth, thin layer of your chosen cat eye gel polish. It’s crucial not to cure this layer yet. This is the moment where the metallic particles are ready for manipulation.
Step 5: The Magnetic Magic
Immediately after applying the cat eye gel, position your nail magnet 2-5mm above the nail surface. Hold it perfectly steady and still for 5-10 seconds. Observe as the mesmerizing stripe forms and takes its shape. Work on one nail at a time to prevent the polish from settling prematurely.
Step 6: Immediate Curing
Without any movement of your hand, swiftly slide your magnetized nail directly under the UV/LED lamp and cure for the recommended time (usually 60 seconds). This locks the delicate magnetic stripe firmly in place, preserving its crisp definition.
Step 7: Seal with a Top Coat
Once all nails are magnetized and cured, apply a glossy gel top coat. This final layer intensifies the shine, protects the cat eye effect from chipping, and provides a durable finish. Ensure you “cap” the free edge of each nail with the top coat for maximum longevity. Cure the top coat fully under your lamp.
Frequently Asked Questions About Cat Eye Nail Varnish
Do you need a UV/LED lamp for cat eye nail varnish?
For most gel-based cat eye varnishes, a UV/LED lamp is essential. The gel requires curing immediately after magnetizing to set the stripe. Without a lamp, the gel won’t harden correctly, and the magnetic effect will dissipate. While some air-dry lacquers exist, they often offer less defined and shorter-lasting results.
Can you mix cat eye polish with other colors?
Absolutely! Many nail artists recommend a dark base coat, such as black, navy, or deep plum, underneath the cat eye layer to create vivid contrast for the stripe. You can also layer different cat eye polishes (a dark one followed by a lighter one) for a unique multi-dimensional ombré effect. Magnetize each layer separately.
Are there beginner-friendly cat eye techniques?
Yes, the single-line cat eye over a black base is the most forgiving starting point for newcomers. It offers strong contrast, a dramatic result, and a straightforward technique. Once comfortable, you can explore diagonal stripes, double bars, and color-shifting aurora effects. Mastering one clean line is the recommended first step in 2026 beginner guides.
How to Master Your Cat Eye Manicure
Step 1: Prep Your Canvas
Ensure nails are clean, dry, and lightly buffed. Push back cuticles and wipe with alcohol for optimal adhesion. This meticulous preparation prevents lifting and extends the wear of your cat eye nail varnish.
Step 2: Apply Base and Dark Color
Apply a thin gel base coat and cure. Follow with a thin layer of dark gel polish (like black or deep blue) and cure again. A dark base intensifies the magnetic effect of the cat eye nail varnish.
Step 3: Magnetize Your Cat Eye Varnish
Apply a thin layer of cat eye gel, but do NOT cure it. Immediately hold a magnet 2-5mm above the nail for 5-10 seconds until the desired stripe forms. Work on one nail at a time to prevent settling.
Step 4: Cure and Seal
Without moving your hand, immediately cure the magnetized nail under your UV/LED lamp. Once all nails are complete, apply a glossy top coat, capping the free edge, and cure fully to protect the design.
Final Thoughts: Is Cat Eye Nail Varnish Truly Worth It?
Without a doubt, the answer is a resounding yes! Once you’ve honed the technique—and it truly does become intuitive after just a couple of attempts—cat eye nail varnish delivers salon-quality results within the comfort of your home, and at a mere fraction of the cost. The sheer variety of looks achievable, from understated everyday shimmer to full-blown aurora fantasy nails, makes this trend incredibly versatile and perfectly aligned with 2026’s dynamic beauty landscape.
Whether you’re attempting your very first single stripe or experimenting with layering chrome powder over a sophisticated double-bar design, the creative possibilities with cat eye nail varnish are endless. Begin with simple designs, dedicate careful attention to your magnet application, and you’ll soon find yourself wondering how you ever settled for plain nails before. This transformative polish is a genuine game-changer for anyone passionate about stunning nail artistry.
Have you tried cat eye nail varnish? We’d absolutely love to hear about your favorite color combinations and unique styling tips in the comments below! 💅